Devil’s Bridge Trail Guide (2026)

Devil’s Bridge is the largest natural sandstone arch in the Sedona area — and the most photographed spot in Red Rock Country. The famous image (a lone hiker standing on the arch with red rock wilderness dropping away behind) is real, and the bridge is genuinely spectacular. But the trail is also Sedona’s busiest, the final climb is a genuine scramble, and getting the logistics wrong — wrong trailhead, wrong start time, wrong vehicle — can turn a great morning into a frustrating one. This guide fixes all of that. Pair it with our Cathedral Rock trail guide for Sedona’s other must-do hike.
Who it’s for: reasonably fit hikers, photographers, first-time Sedona visitors who want the iconic shot. Who should think twice: anyone with a strong fear of heights (the bridge has no railings), bad knees (the descent is steep), or very young kids (the final scramble needs hands and feet).
Devil’s Bridge: Quick Stats
| Distance (round trip) | ~1.8 mi from Devil’s Bridge Trailhead (4×4 only) | ~4 mi from Mescal Trailhead | ~4.2-5.8 mi from Dry Creek Vista Trailhead |
| Elevation gain | ~400-500 ft (most of it in the final scramble) |
| Difficulty | Moderate (final scramble: moderate-difficult) |
| Time | 2-3 hours, plus photo-line wait |
| Fee | Red Rock Pass ($5/day) at trailhead lots; free if you ride the shuttle |
| Dogs | Allowed on leash on the trail (not allowed on the shuttle) |
| Best start time | At or before sunrise |
Which Trailhead to Choose: Dry Creek vs. Mescal (Read This First)
Devil’s Bridge Trailhead (the close one) — 4×4/high-clearance only. Past the Dry Creek Vista lot, Forest Road 152 continues ~1.3 miles as a very rough dirt road to a small signed parking area near the actual trail start. From here it’s only ~1.8 miles round trip. Do not attempt this road in a standard rental car — it’s rutted, rocky, and narrow, and getting stuck (or damaging the car) is a real risk. If you have a true high-clearance 4×4, this is the shortest option.
Mescal Trailhead — the smart choice for most hikers. Paved access off Long Canyon Road, restrooms, and a scenic ~4-mile round trip via the Mescal and Chuckwagon trails to the Devil’s Bridge trail junction. Prettier walk than the Dry Creek route, slightly shorter, and served by the free shuttle. This is our default recommendation.
Dry Creek Vista Trailhead — the classic route. Paved lot with restrooms, ~4.2-5.8 miles round trip depending on your route (Chuckwagon Trail is the scenic option; walking Dry Creek Road itself is not recommended — it’s a dusty, narrow jeep road shared with off-road vehicles). Also served by the free shuttle.
Bottom line: no 4×4? Park at Mescal. Want the shortest possible hike and have real clearance? FR 152. Either way, don’t walk the jeep road.
Getting There: Shuttle vs. Driving (2026 Rules)
The free Sedona Shuttle is the easiest option. Route 11 runs from the West SR-89A Park and Ride (and Posse Grounds) to both the Dry Creek Vista and Mescal trailheads. Normal schedule: Thursday through Sunday, 7:00am-5:30pm; during peak periods (spring break, holidays) it runs seven days a week. No reservations, no parking fee at the park-and-ride, and no Red Rock Pass needed when you ride the shuttle in. Note: dogs are not allowed on the shuttle, and schedules shift seasonally — check sedonashuttle.com before your trip.
Driving: From the SR-179/89A roundabout in Sedona, go ~3.2 miles west on 89A to Dry Creek Road, turn right, and follow signs — ~2 miles to the Dry Creek Vista turnoff, ~2.9 miles to Long Canyon Road for Mescal. If driving to Dry Creek Vista or Mescal, display a Red Rock Pass ($5/day) on your dashboard. Trailhead lots fill by mid-morning on weekends — another reason to shuttle or start at dawn.
The Trail: What It’s Actually Like
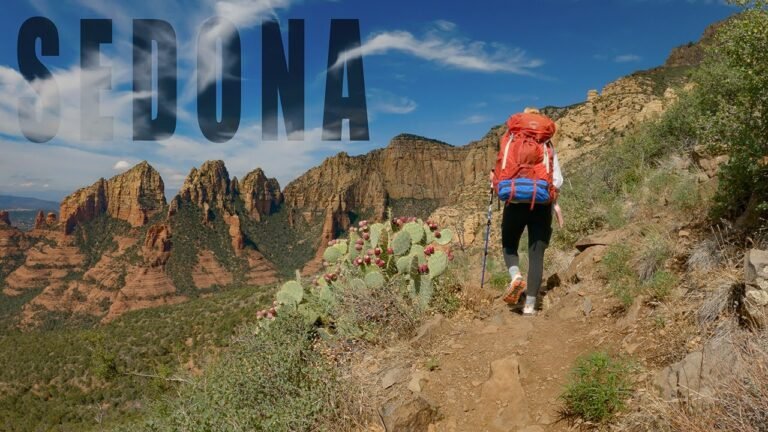
The walk in is the easy part. From Mescal or Dry Creek Vista, the first stretch follows wide, gentle trail through juniper and pinon — the old jeep-road section is flat and dusty, then the Chuckwagon/Mescal connectors wind through prettier desert with views of the red rock formations building ahead. This is pleasant hiking; save your energy.
The final scramble is where the moderate rating earns its keep. The last stretch climbs steeply up slickrock — part staircase (some sections have stacked-rock steps), part genuine rock scramble requiring hands and feet. It’s short but demanding, and in busy periods it bottlenecks: expect this section alone to take 30-45 minutes when crowded, as hikers queue going up and down the narrow passage. Take your time, test every foothold, and let faster hikers pass.
The bridge itself. You emerge onto a viewpoint above the arch first — then the trail drops slightly to the arch. Here’s what the photos don’t tell you: the top of the bridge is wider than it looks in pictures, but there are no railings, and the drops on both sides are sheer. Walk out only if you’re comfortable; there’s no shame in admiring it from the viewpoint. If someone is already on the arch, wait your turn — crowding the bridge is how accidents happen.
A serious note: falls here have been fatal. In 2014, a hiker died from a fall on the steep stairs section beside the bridge. The rock is unforgiving, and rescue is slow. Stay on the trail, keep kids close on the scramble, and never back up for a photo near an edge.
Photo Tips (and the Line)
The iconic shot — standing alone on the arch — requires patience. At peak times (10am-2pm, weekends, spring/fall), the wait for a bridge photo runs 15 minutes to over an hour. The unwritten rule: one person or group on the arch at a time, everyone else waits at the viewpoint. Hikers are generally friendly about taking each other’s photos — offer to shoot for the group ahead of you and they’ll return the favor.
For the best photos: morning light hits the arch beautifully and the crowds are thinnest. A wide-angle lens (or your phone’s wide mode) captures both the arch and the drop. And here’s the photographer’s secret: the classic shot is taken from the viewpoint trail below and beside the arch, not from on it — you need a friend (or a kind stranger) down there while you walk out.
Beating the Crowds
- Start at sunrise. On the trail by 6:00-6:30am and you’ll share the bridge with a handful of people instead of a hundred. By 9:30am on a spring weekend, the photo line is real.
- Go on a weekday. Tuesday-Thursday mornings are dramatically quieter than weekends.
- Avoid the 10am-2pm window entirely if you dislike crowds.
- Consider the Mescal approach — it’s marginally less trafficked than the Dry Creek Vista start.
- Off-season (summer heat, winter weekdays) brings solitude, with weather tradeoffs: carry extra water in summer, watch for ice on the scramble in winter.
What to Bring and Safety
- Water: at least 1.5 liters per person, more in summer. There is no water on the trail.
- Footwear: closed-toe shoes with real grip — trail runners or hiking shoes. The slickrock scramble punishes smooth soles.
- Sun protection: hat, sunscreen, sunglasses. Shade is minimal.
- Snacks: you’ll be out 2-4 hours with the photo wait.
- Phone: charged, with the trail map downloaded (service is spotty).
- Layers: desert mornings are cold even when afternoons are hot.
- Leave the dog home if you’re taking the shuttle (dogs aren’t allowed on board); on the trail, dogs must be leashed — the scramble is rough on paws.
- After rain: the slickrock gets dangerously slippery. If it rained overnight, delay your start.
- Tell someone your trailhead and expected return time.
Frequently Asked Questions
How long is the Devil’s Bridge hike?
About 1.8 miles round trip from the Devil’s Bridge Trailhead (4×4/high-clearance access only), ~4 miles round trip from the Mescal Trailhead, or ~4.2-5.8 miles from the Dry Creek Vista Trailhead. Most hikers take 2-3 hours plus waiting time for photos.
Can you drive to Devil’s Bridge trailhead?
Only with a high-clearance 4×4. Forest Road 152 past the Dry Creek Vista lot is a very rough dirt road — standard rental cars should not attempt it. Everyone else should park at the Mescal or Dry Creek Vista trailheads, or ride the free Sedona Shuttle.
Is the Sedona Shuttle free and does it go to Devil’s Bridge?
Yes. The free Sedona Shuttle (Route 11) serves the Dry Creek Vista and Mescal trailheads, running Thursday-Sunday 7am-5:30pm (daily in peak season). No Red Rock Pass is needed when you shuttle in.
Is Devil’s Bridge scary? Is it safe to walk across?
The arch is wider than photos suggest, but there are no railings and the drops are sheer — a fall would be fatal, and fatal falls have happened here. Walk out only if you’re comfortable with heights; the viewpoint beside the arch offers nearly as good a view with far less risk.
What time should I start the Devil’s Bridge hike?
At or before sunrise. Starting by 6:00-6:30am means thin crowds and the best light; by late morning on weekends, expect a 15-60 minute wait just for a photo on the bridge.
Do I need a Red Rock Pass for Devil’s Bridge?
A $5/day Red Rock Pass is required when you park at the Dry Creek Vista or Mescal trailhead lots. If you ride the free Sedona Shuttle to the trailhead instead, no pass is needed.